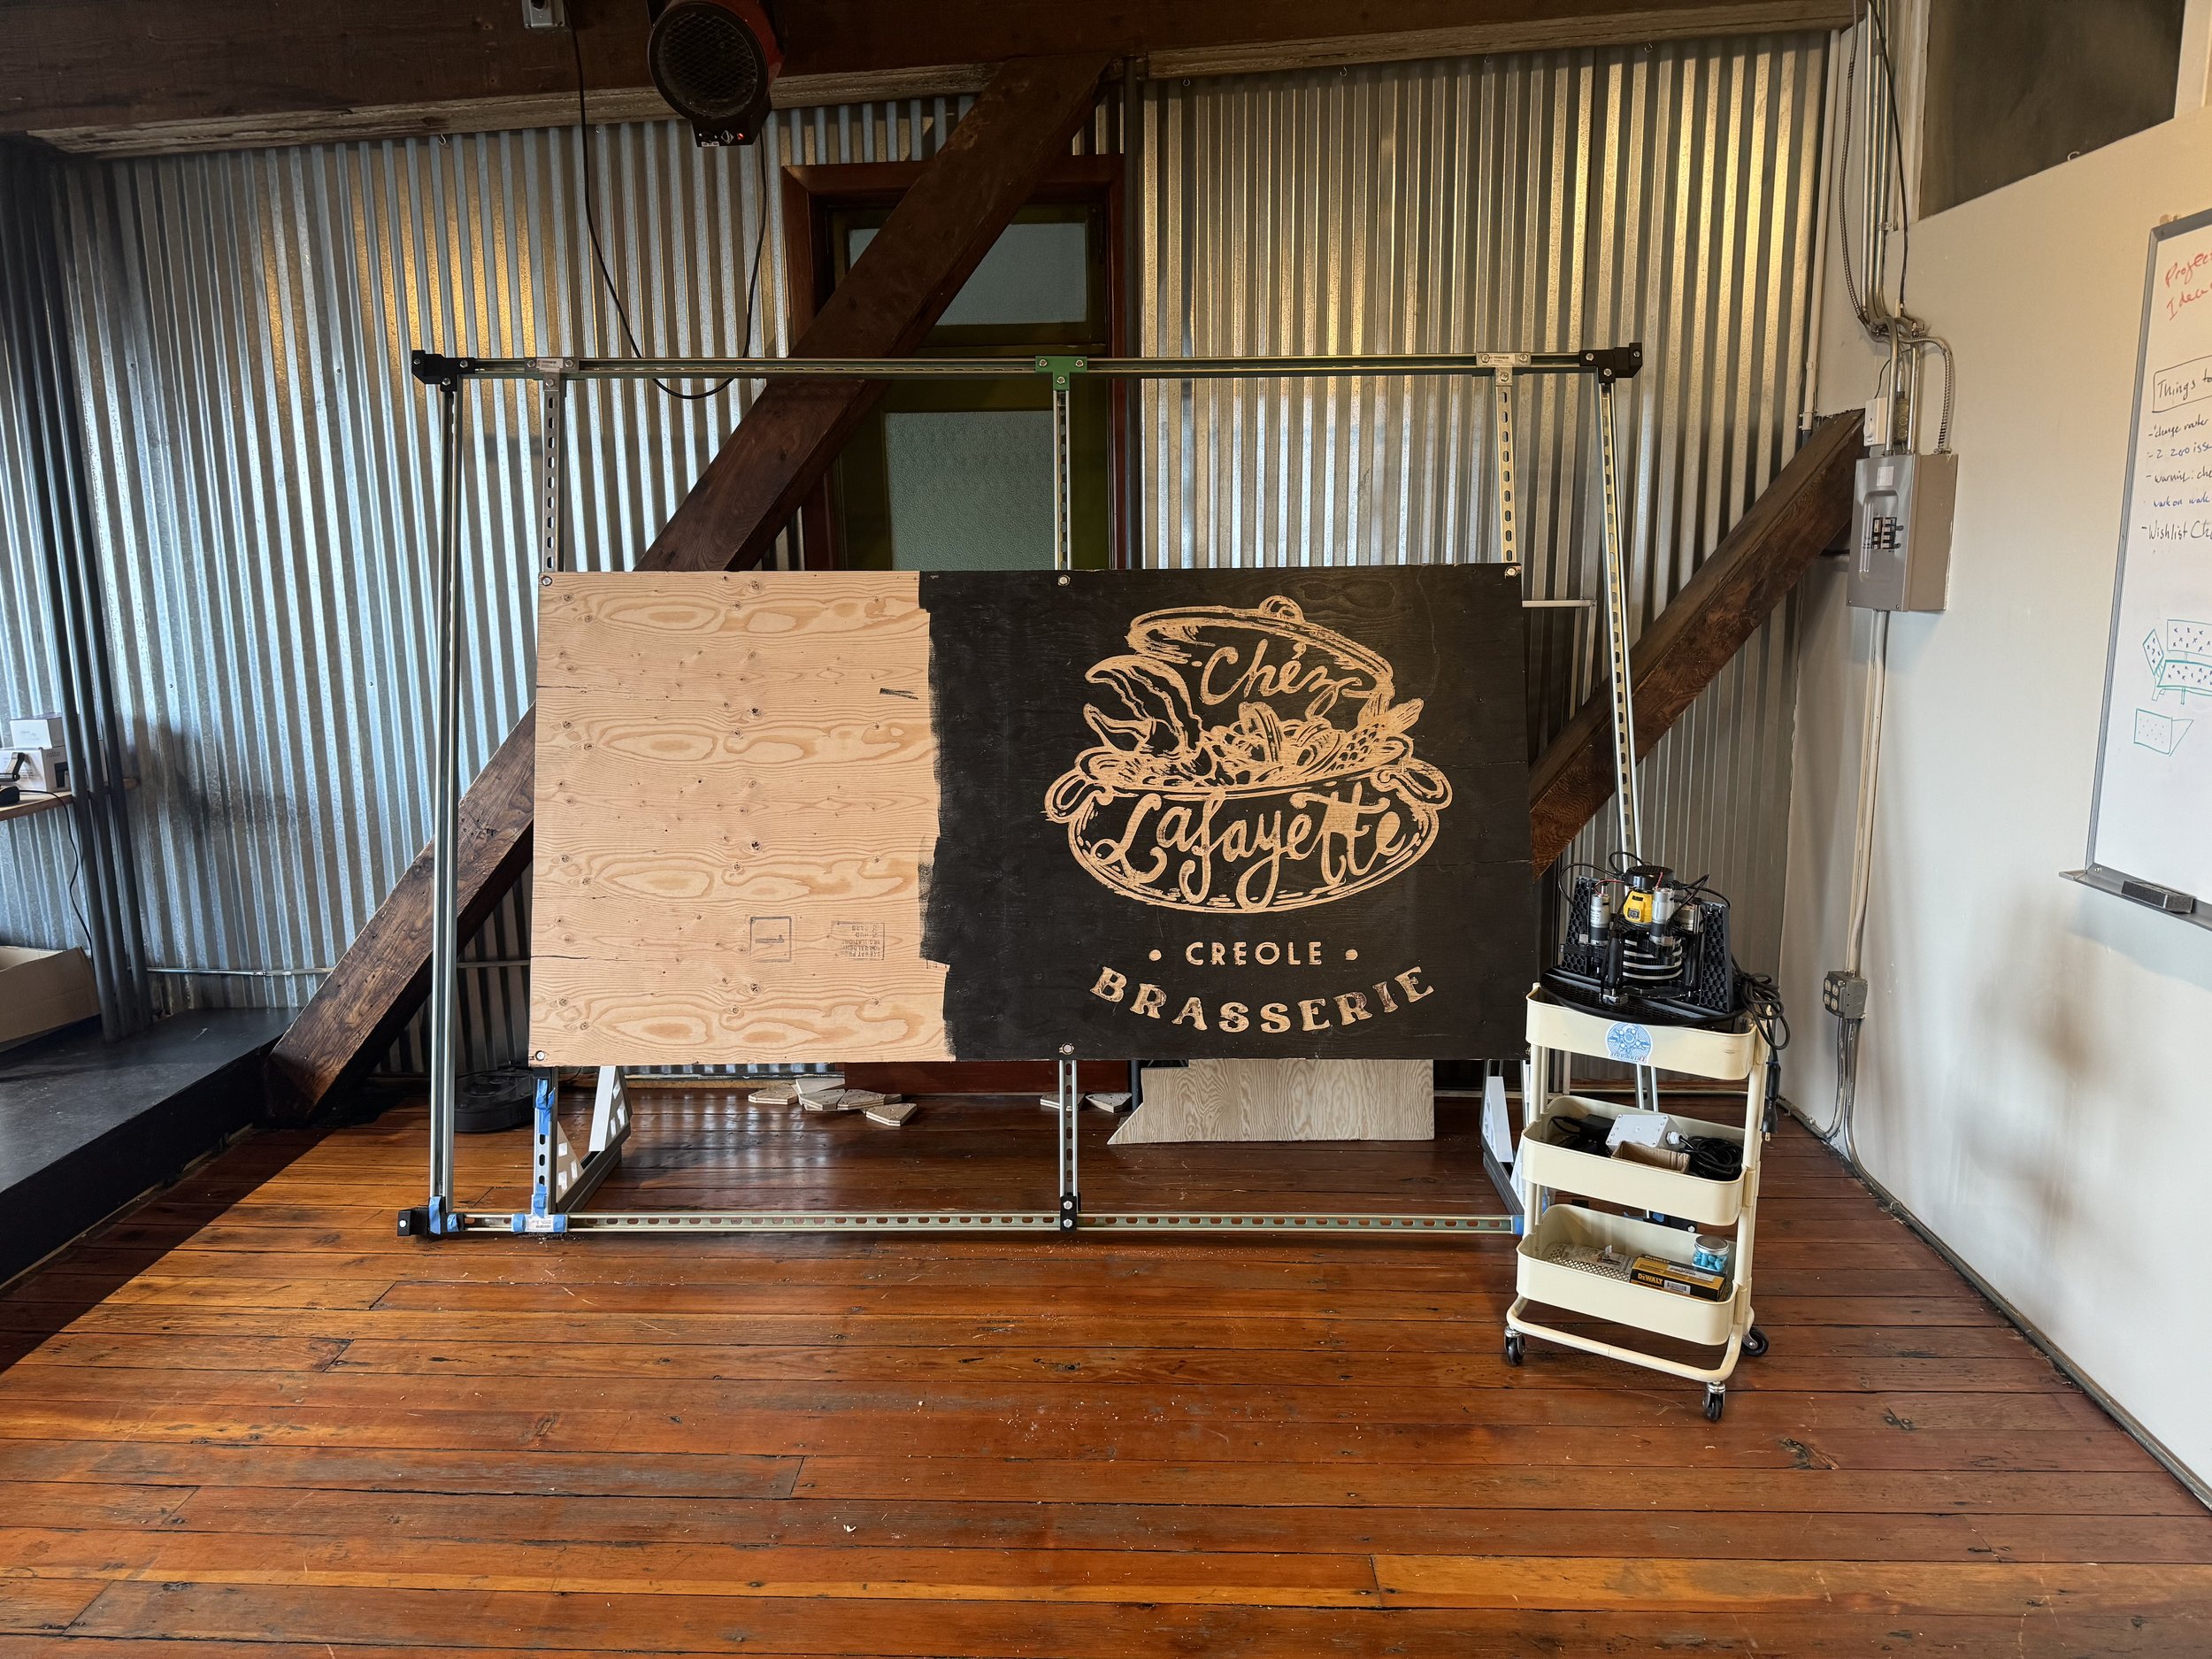
This steel frame constructed from strut channel is the first frame that we built, but we don’t particularly recommend building it. Here is why:
Unistrut is pretty expensive and this frame uses a lot of it so it ends up costing quite a bit to build
Steel is pretty springy so the frame ends up being more flexible than a comparable wooden frame
It uses a lot of really big 3D printed parts which isn’t so much of a problem if you have a 3D printer, but if you have to pay to have them printed they will be pretty expensive
That being said, enough people have asked about it and we aren’t interested in hiding any information so here is how we built it.
You can find files for all of the 3D printed parts in the Not-Shop.
Our frame is constructed from 10 foot lengths of strut and we used eight of them. We used 64 uni-strut bolts and nuts to hold them together.
At each junction we joined the uni-strut with either a T or L plate.
Initially we were using steel ones, but they cost like $11 each so we switched to 3D printed ones which seemed to work just as well.
To attach the spoil board to the unistrut verticals we used six counter-sunk uni-strut bolts and nuts.
In the corners we used a 3D printed anchor point which slips over the end of the strut.
Initially we only had the central three vertical struts, but we found that the steel had too much flex in that configuration so we added additional vertical struts right next to each anchor point.
To create the legs for the frame to stand up we used three large 3D printed parts and strut. Note that the frame is lifted up off the ground slightly with some extra strut material. This is to let the anchor points on the end slide over the strut there.
The lengths of the two parts making up this leg are 21 and 36 inches long.


